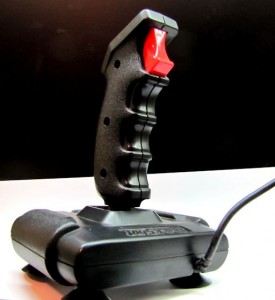
When I found this ancient QuickShot Joystick which seemed to be still in working order, I just had to make it work again. Of course, no modern computer knows how to interface with such a dinosaur, so I build a “translator” system using and Arduino Leonardo. Here’s how.

Connector And Pins
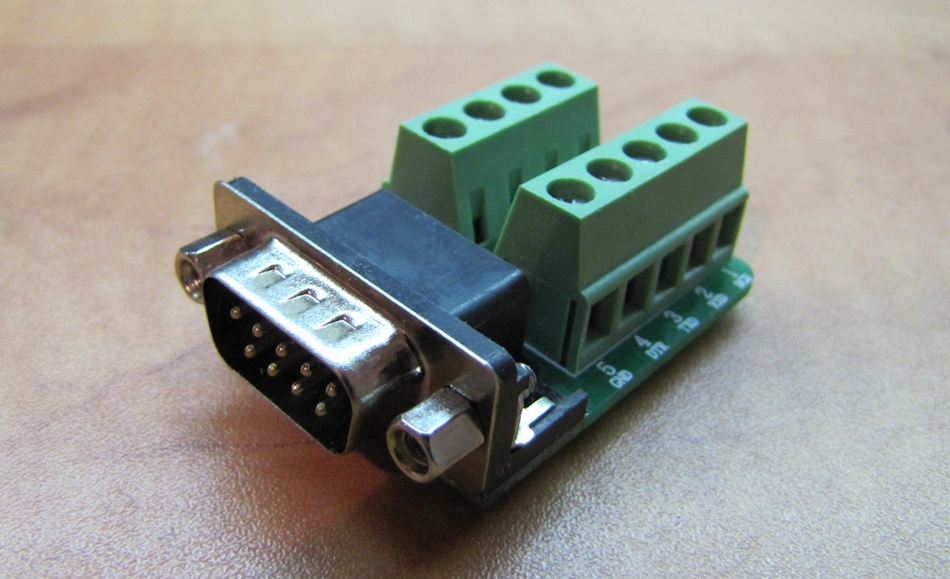
These prehistoric joysticks, made for Atari, C64, Amiga, Spectrum and other bygone systems, usually had no electronics in them; just a bunch of switches and springs. They had a standard 9-pin “D-Sub” connector (DE-9), and all the joystick mechanisms actually did was to short-circuit some of the connector’s pins together. One can figure the pinout quite easily with a bit of trial and error, but I found the required information in this useful page. I didn’t have heart to cut the original cable and expose the wires, and regular breadboarding wires don’t fit comfortably into the connector holes, so instead I got a “DE9 Breakout Board” from ebay (about $3):

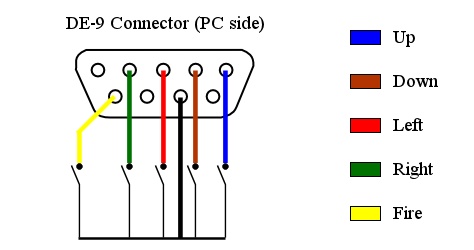
This breakout has two sides: the 5-pin side (five block terminals wired to the top row of the connector) and the 4-pin side (bottom row). It’s possible to trace, visually, which pin each terminal connects to, so all we really need is the diagram from the link above. Schematically, the pinout looks something like this:

So in theory, if we connect the pin with the black wire to an Arduino’s GND pin, and the rest of the pins to the Arduino’s digital input pins with internal pullup resistors activated, we can simply check the inputs and thus read the joystick (in negative logic, 0 = activated and 1 = released). Also, the checks don’t need to be too frequent, because human motions are way slower than the microcontroller.
An Advanced Feature
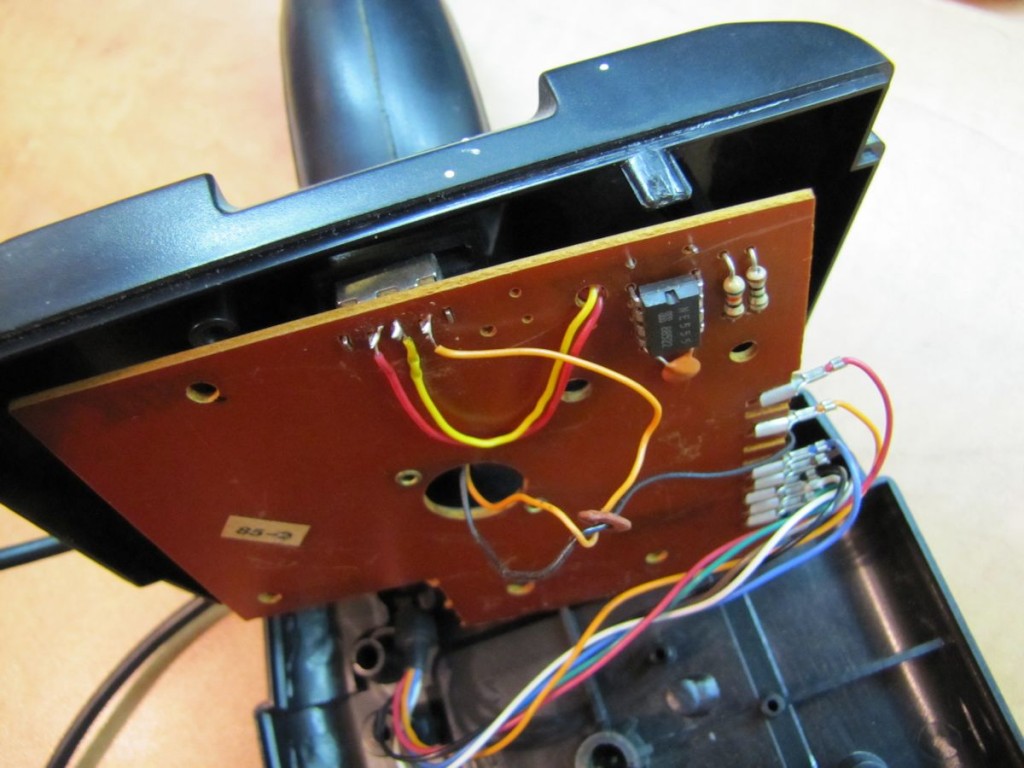
There is one thing I overlooked, though: autofire (“rapidfire”). This joystick has an “Auto Fire” switch that determines what happens when you hold the fire button pressed for a long time. When OFF, the electrical connection is maintained continuously until you release the button. When ON, it emits press and release signals again and again, to help the poor fingers of gamers in intense action games. As it turns out, this rapid firing function was achieved using a 555 timer IC, which of course needs external power. This was provided through a pin in the bottom row, between the Fire and the GND lines.

Arduino As Interface
The information above is sufficient to use the joystick as an input device for the Arduino itself – for example, to drive a robot or aim a servo-mounted device. To use this as an input device for the PC, we need to go one step further.
Back in the old days, while game-oriented machines such as the Amiga or the Commodore 64 had native joystick ports, the “all-purpose” IBM-complatible PCs didn’t; Instead, they utilized the keyboard keys. This remains somewhat of a standard even today, so in order to have the joystick control a PC game, we simply need to translate the joystick’s input to keyboard keys. The natural candidate for this job is an Arduino Leonardo (or a clone, like the one I’m using here). It can emulate a keyboard, with our code determining what keys are “pressed” or “released” and when.
The code below maintains a small array of structures, each containing the input pin number, its last state and what keyboard key is associated with it. The main loop scans the input pins over and over again, checks for state updates and then presses or releases the appropriate keys using the built-in keyboard library.
// QuickShot Joystick to Keyboard Converter
// For the Arduino Leonardo
// by Ido Gendel, 2014. Share and enjoy!
// 5 inputs: Up, Down, Left, Right and Fire
#define INPUTS 5

struct tJSInput {
  byte pin;
  boolean state;
  byte key;
} JSInput[INPUTS] = {{8,  0, 232},
                     {9,  0, 226},
                     {10, 0, 228},
                     {11, 0, 230},
                     {12, 0, 229}};

void setup() {
  pinMode(13, OUTPUT);
  for (int j = 0; j < INPUTS; j++) {
    pinMode(JSInput[j].pin, INPUT_PULLUP);
    JSInput[j].state =
     digitalRead(JSInput[j].pin);
  }  // for

 // Time for re-programming in case of trouble
 delay(4000);
 digitalWrite(13, HIGH); // "active" Indication
 Keyboard.begin();
} // setup

void loop() {
  for (int j = 0; j < INPUTS; j++)
    if (digitalRead(JSInput[j].pin) !=
        JSInput[j].state) {
      JSInput[j].state = !JSInput[j].state;
      if (JSInput[j].state)
        Keyboard.release(JSInput[j].key);
       else Keyboard.press(JSInput[j].key);
    } // for
  delay(5);
} // loop
The 5ms delay is a compromise between two conflicting needs. The first is to debounce the input – that is, avoid a problematic effect of mechanical switches in general, where the electrical connection is unstable for a few milliseconds when changing state. If the delay is too short, the system may catch these fluctuations and interpret them as actual user movements. The second need is to be able to capture the state changes as quickly as possible – i.e. prevent lags. If the delay is too long, it will harm the gaming experience.
Arduino Leonardo As Numeric Keypad
The other non-trivial thing in the code above is the keyboard key codes (232, 226 etc.). I wanted the joystick-Arduino to emulate the PC’s numeric keypad, and as it turns out, even with NumLock ON the digits on the numeric keypad do not have the same codes as regular digits. Check out the link for codes to the entire pad.
Finally, here’s a video of the setup and the system in action:

Good Information for this Article
Hey
Not sure if you still check this, but I am trying to do a similar project where I use a normal joystick to emulate arrow keypresses. I tried your code but no luck. Any advice or tips? I am really struggling,
Regards
Red
I’m still here, but I can’t offer any help with so little information… except the usual methodology: break it up into smaller tasks. Can you read the joystick movements using the Arduino? (just read it and output some indication, e.g. an LED) Can you send predetermined “key presses” from the Arduino to the PC? When all the little parts work, you can start putting them together. Good luck!
Hey 🙁 i’m having troubles with the code. I’m using a 4-axes thumbstick, and I need the keys still writing while pressing the button from the joystick. With your code, it writes only once the key, and I don’t know how to make it work as I need to…
My code sends a “key press” when it first detects a button press, and a “key release” when you let the button go. If you want it to keep sending key presses as long as the button is pressed (“rapid fire”), that will require some code adjustments. Is that what you mean?
Nice job! I made a similar project but instead of emulating keys it emulates 2 digital gamepads:
“FAST HID Joystick converter for 2 digital joysticks”
http://forum.arduino.cc/index.php?topic=134108.0
Very interesting, I didn’t know it’s possible to define USB devices like that on the Leonardo. Where can I find more information?
With the Leonardo you can emulate any USB device you can imagine.
Look at http://www.usb.org/developers/hidpage
Here you can also find a tool called “HID Descriptor Tool” which makes the setup of the HID file easier .